हठस्य प्रथमाङ्गत्वादासनं पूर्वमुच्यते।
कुर्यत्तदासनं स्थैर्यमारोग्यं चाङ्गलाघवम्।। (Hatha Yoga Pradipika 1.17 by Swami Swatmarama)
Transliteration :
Haṭhasya prathamāṅgatvād āsanaṁ pūrvam ucyate।
Kuryat tad āsanaṁ sthairyam ārogyaṁ cāṅgalāghavam।।
Translation: “Āsana is said to be the first step in Hatha Yoga. By practicing it, one attains stability, health, and lightness of the body.”
Yoga is a disciplined practice that includes maintaining various body positions, breathing exercises, and meditation to enhance physical and mental well-being. The main objective of incorporating specific poses such as padmasana (lotus pose), Surya asana, setu bandhasana (bridge pose), and dog pose into a daily routine is to improve flexibility, strength, and balance while fostering overall health. Bodhidham is a yoga school and retreat ashram located in Pokhara, Nepal, catering to beginners to experienced practitioners of yoga through the teachings of skilled, qualified masters. Among many productive poses having equally important but different benefits to physical, mental, and spiritual health, the following are the 5 essential yoga poses to improve your physical health daily.
What follows keeps that promise but goes further than a benefits list. For each pose, alongside why it matters, you will find exactly how to move into it safely, the one adjustment that prevents most injuries, and who should modify or skip it. You can also watch many of these demonstrated in our free yoga posture library.
Quick Reference
| Pose | Sanskrit Meaning | Mainly Works | Watch Out For |
|---|---|---|---|
| Padmasana | Lotus seat | Hip rotation, seated stillness | Forcing the knee instead of the hip |
| Surya Namaskar | Sun greeting | Full-body warm-up, cardio | Rushing the breath–movement link |
| Adho Mukha Svanasana | Downward-facing dog | Hamstrings, shoulders, spine | Collapsing weight into the wrists |
| Virabhadrasana I | Warrior (after Virabhadra) | Legs, hips, core, focus | Front knee caving inward |
| Setu Bandhasana | Bridge lock | Spine, glutes, chest | Weight rolling onto the neck |
Padmasana pose ( lotus pose)
Padmasana pose is also popularly called the lotus pose, where an individual practices yoga in a seated posture, ideal for promoting physical and mental equilibrium. It is an essential yoga pose that is responsible for enhancing the flexibility of hips, knees, and ankles by improving posture and spinal alignment, as well as by promoting relaxation and stimulation of blood flow in the pelvis.
How to get into it:
1. Sit in a simple staff position, legs extended, spine tall.
2. Bend the right knee and rotate at the hip, not the knee, bringing the right foot up onto the left thigh, sole facing upward.
3. Bend the left knee and rotate at the hip the same way, bringing the left foot onto the right thigh.
4. Let both knees settle toward the floor without forcing them down. Hands rest lightly on the knees.
5. To come out, reverse slowly, one leg at a time. Never yank the top foot free.
The rotation has to come from the hip joint, not the knee. The hip is built for this kind of rotation. The knee is a hinge, not built to take that load, and it will happily let you fake the movement right up until it doesn't.
The mistake almost everyone makes is cranking the top foot into place by twisting through the knee when the hip simply isn't open enough yet. Because the knee moves more easily under pressure than a tight hip does, people substitute one for the other without realizing it, and this single substitution is one of the most commonly cited causes of yoga-related knee injury.
Don’t do Padmasana if you have a current or recent knee injury, meniscus damage, or real ankle instability. This is not a pose to push through sharp knee pain to reach. Honestly, the calming, meditative benefits people describe from this pose are real lived experience passed down through the tradition, not something a clinical trial has measured. That does not make them less true for the person feeling them. It just means they belong in a different category of evidence than the next pose.
Surya asana ( Surya Namaskar – Sun Salutation)
Surya Asana, also known as Surya Namaskar and popular as the Sun Salutation, is the dynamic sequence resulting in a complete body workout that energizes and strengthens the physique. It is responsible for improving flexibility and muscle tone and enhancing coordination and body awareness. Additionally, it boosts cardiovascular health and endurance.
The twelve steps, in order:
1. Pranamasana, standing with palms together at the chest.
2. Hasta Uttanasana, arms rising overhead, gentle backbend.
3. Uttanasana, folding forward over the legs.
4. A low lunge, right leg stepping back.
5. Plank position.
6. Ashtanga Namaskara, knees, chest, and chin lowering to the floor.
7. Bhujangasana, cobra, chest lifting.
8. The hips lifting into an inverted V, essentially the same shape as Downward Dog, sometimes called Parvatasana in this context depending on which teacher trained you; both names describe the same shape here.
9. The low lunge again, left leg stepping back this time.
10. Uttanasana, folding forward again.
11. Hasta Uttanasana, rising with arms overhead.
12. Pranamasana, returning to standing.
Let the breath lead the movement rather than the other way around. Inhale on the backbends and the arm-raises, exhale on the forward folds and the lowering movements. When people rush this sequence, it is almost always because they have stopped breathing with it and started just moving through shapes.
The mistake almost everyone makes is collapsing through the lower back in the cobra step by pushing up hard through the arms instead of lengthening through the chest first, and rushing the whole sequence faster than the breath can actually keep pace with.
Skip or modify if: you have high blood pressure, since the sequence's pace and intensity genuinely raise it, you are pregnant (several of the steps put real pressure through the abdomen, this one is worth avoiding through pregnancy rather than just modifying), you have a hernia, a recent back or abdominal surgery, or an acute disc issue, in which case talk to a doctor before starting.
Adho Mukha Svanasana ( Downward-facing dog pose)
Adho Mukha Svanasana is simply known as the Downward-facing dog pose, which is a foundational pose that has proven to be a major pose in many yoga practices as it has incredible benefits for the entire body. This pose has the main advantage of stretching the hamstrings, calves, and spine while strengthening the shoulders, arms, and wrists. This pose is also effective in improving blood circulation when the body is inverted.
How to get into it:
1. Start on hands and knees, hands under the shoulders, knees under the hips.
2. Spread the fingers wide and press firmly through the whole palm and the base of the fingers, not just the heel of the hand.
3. Tuck the toes and, on an exhale, lift the hips up and back.
4. Straighten the legs as far as your hamstrings actually allow, no further. Bent knees are completely fine here.
5. Let the head hang heavy, ears roughly in line with the upper arms, gaze toward the feet or navel.
6. Come down by bending the knees and returning to hands and knees.
Keep the weight spread through the base of the fingers and knuckles, not sagging back into the wrist crease, and actively draw the shoulder blades down the back rather than letting them creep up toward the ears.
The mistake almost everyone makes: letting the shoulders ride up near the ears, which shifts the load onto the neck and traps instead of the shoulder girdle where it belongs, alongside collapsing weight backward into the wrists instead of pressing forward through the fingers.
Skip or modify if: you have carpal tunnel syndrome or a wrist injury, and use forearms or a wall instead. If you have high blood pressure, hold this pose only briefly rather than for long stretches, since the head-down position affects blood pressure regulation. If you have glaucoma, this one deserves real caution, and not just as a general rule of thumb; a direct study measuring eye pressure during common yoga poses found a real, measurable rise in intraocular pressure within about a minute of coming into this shape, in people with and without glaucoma, returning to normal within a couple of minutes of sitting back up. If you are pregnant, the research here is genuinely mixed rather than settled; one study found it well tolerated late in pregnancy for healthy women with modifications like a wider stance, but this is a pose to practice with a prenatal-qualified teacher rather than to assume is fine by default.
Virabhadrasana ( Warrior) pose.
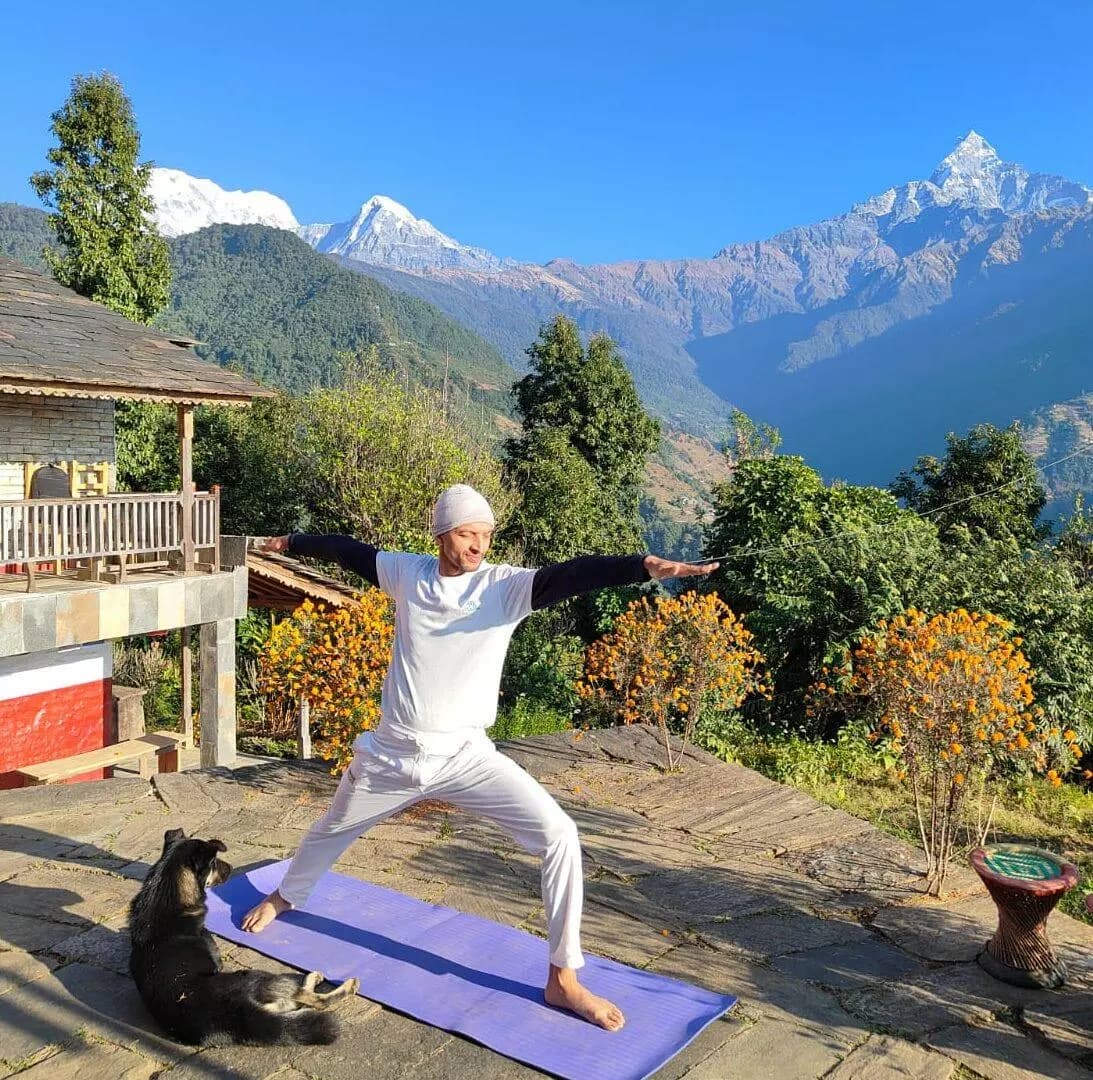
Virabhadrasana pose is simply known as the Warrior pose. It is performed standing and is a powerful standing pose that builds strength and endurance while improving balance. The key benefit of this pose is the achievement of strength in the legs, glutes, and core. This position specifically opens the hips and chest and also enhances focus and stamina.
How to get into it:
1. From standing, step the feet three to four feet apart.
2. Turn the right foot to point forward, and angle the back left foot in slightly, pressing its outer edge and heel down into the floor.
3. Square the hips and chest to face forward as much as is comfortable, without forcing it.
4. Bend the right knee to roughly a right angle, keeping it stacked directly over the ankle.
5. Inhale and raise the arms overhead, shoulders relaxed down away from the ears.
6. Hold, breathing steadily, then straighten the front leg and lower the arms to exit. Repeat on the other side.
The one cue that matters most: the front knee has to track directly over the front ankle, never collapsing in toward the midline. This is the single point in the pose most likely to cause real injury if ignored.
The mistake almost everyone makes: trying to square the hips fully forward when the hips genuinely aren't open enough yet to allow it, which forces that leftover rotation into the knee joint instead, exactly the same substitution pattern that causes trouble in Lotus Pose. If your back heel won't reach the floor without your knee twisting to compensate, shorten your stance rather than force the heel down.
Skip or modify if: you have acute knee pain, a shoulder injury limiting overhead movement, uncontrolled high blood pressure, or significant balance concerns. Pregnancy guidance here is contested across different teaching traditions; some avoid it for the abdominal pressure the lunge creates, others teach it with a wall for support and a wider stance, so treat this as one to modify heavily and discuss with a prenatal-qualified teacher rather than follow a single blanket rule.
The focused quality Warrior demands, holding physical effort with a directed, steady attention, is the same quality yoga philosophy tracks through the five states of mind, from the scattered, easily pulled attention of ordinary life toward the one-pointed focus the sutras call ekagra. The Five States of Mind in Yoga Philosophy goes into that progression in depth.
Setu Bandhasana ( Bridge pose)
Setu Bandhasana is also called the Bridge pose, and it requires a gentle backbend that is ideal for strengthening the spine and opening the chest. The main objective of this yoga pose is to stretch the chest, neck, and spine while strengthening the back, glutes, and hamstrings. This has proven results in stimulation of the thyroid and lungs, ultimately enhancing respiratory function. It is strictly advised to avoid over-arching the back by keeping the thighs and knees parallel.
How to get into it:
1. Lie on your back, knees bent, feet flat on the floor, hip-width apart, heels close enough to just about brush your fingertips.
2. Rest your arms alongside your body, palms down.
3. Press the feet and arms into the floor and, on an exhale, lift the hips.
4. If it's comfortable, interlace the hands underneath your back and roll the shoulders under to open the chest.
5. Keep the chin gently away from the chest. Do not turn your head once you're lifted.
6. Come down slowly, one vertebra at a time.
The one cue that matters most: the weight of the pose belongs on your shoulders, never on your neck or the back of your head, which has to stay neutral and relaxed the entire time.
The mistake almost everyone makes: letting the knees splay outward as the hips rise, which takes the strengthening effect away from the glutes and inner thighs and can put unwanted strain through the lower back and hips instead.
Skip or modify if: you have a neck injury or have had recent neck or spinal surgery, in which case this pose needs a qualified teacher's direct guidance or should be avoided. The same caution applies to shoulder injuries, herniated discs, and acute sciatica. In later pregnancy, keep any hold brief rather than sustained, since lying flat on the back for extended periods is a standard prenatal caution, and a block under the hips is a reasonable modification. One honest note: you will often read that this pose stimulates the thyroid gland. That is a traditional belief passed down through the practice, not a claim with real clinical evidence behind it, and it belongs on this page labeled exactly that way rather than dressed up as fact.
Bodhidham Yoga School and Retreat Ashram, being surrounded by the Himalayas, provides the most suitable environment for the most effective and efficient yoga practices, meditation, and breathing exercises under the supervision of experienced practitioners of Yoga. Practitioners who want to take these poses beyond the studio often find that Surya Namaskar's cardiovascular conditioning translates directly to Nepal's mountain trails. Yoga and Trekking: Why Combine Them explores what that combination actually looks like in practice. Contact the friendly team of Bodhidham for information and to plan on initiating your journey toward the right yoga practices to enhance physical, mental, and spiritual well-being. Learn and practice yoga poses with discipline and patience, enjoying the transformative benefits over time.
Frequently asked questions
- How long should I hold each pose?
For most beginners, five to eight steady breaths per pose is a reasonable starting point, roughly 20 to 40 seconds depending on your breathing pace. Standing poses like Warrior I can be held a little longer as strength builds, while a restorative pose like Child's Pose can be held for as long as feels genuinely comfortable.
2. What's the best time of day to practice these?
Morning practice, before eating, is traditional and works well because the body is naturally warming up for the day ahead, but the honest answer is that the best time is whichever time you will actually do consistently. A shorter practice you repeat daily beats a longer one you only manage occasionally.
3. Can complete beginners do all five of these poses?
Yes, with the modifications described for each one. None of these five require prior flexibility or strength to begin safely; they simply require starting from wherever your body actually is today rather than where you imagine it should be.
4. Is Surya Namaskar one pose or several?
It's a flowing sequence of twelve linked postures, moved through as one continuous unit, not a single static pose. That's part of why it has a measurable cardiovascular effect that a held pose alone typically doesn't.
5. Is it true that Bridge Pose stimulates the thyroid?
That claim is traditional knowledge passed down through the practice rather than something backed by real clinical research. The pose does genuinely stretch the front of the neck and chest and strengthen the back body; those effects are real, the thyroid-specific claim just isn't proven the way it's often presented.
6. Which of these poses actually has research behind it, and which don't?
Surya Namaskar's cardiovascular effect and Tree Pose's balance benefits both have real, citable studies behind them. Downward Dog's effect on eye pressure has been directly measured too, which matters for the glaucoma caution specifically. Padmasana, Warrior I, and Bridge Pose's broader benefit claims are largely traditional and experiential rather than clinically tested, which doesn't make them false, just a different kind of evidence.
7. I have high blood pressure. Which of these poses should I be careful with?
Downward Dog should be held briefly rather than for long stretches, Warrior I's overhead arm position deserves caution, and Sun Salutations should be practiced at a gentler pace. None of these are necessarily off-limits, but this is a case where checking with your doctor and a qualified teacher first is the responsible move.
8. Can I practice these poses during pregnancy?
Some can be modified and continued, others are better avoided depending on the trimester, and the guidance genuinely differs pose by pose rather than following one simple rule, as noted throughout this article. Working with a teacher specifically trained in prenatal yoga is the safest path here, not a generic yoga class.
9. What's the single most common injury risk across all seven poses?
A joint compensating for a limitation somewhere else, most often the knee twisting to fake a hip rotation it isn't ready for, in both Lotus Pose and Warrior I. Once you know to watch for that specific pattern, you can catch it in almost any pose, not just the ones on this list.
10. Do I need to do all seven every day?
No. Even two or three of these, done with real attention to the alignment cues given here, done consistently, will do more for you than rushing through all seven with poor form. Consistency and attention matter far more than covering everything at once.